SubtitleGenerator editorial
How to add captions to a video
Add captions to a video fast — upload locally, review flagged words, then export SRT, VTT or a burned-in video. Free to start, no signup.
You do not need an editing suite to add captions to a video. Upload the file to a browser-based caption tool, review the automatically generated draft, fix the flagged words, and export an SRT or VTT file — or a video with captions burned in. This article covers the whole workflow, from choosing the right output to publishing per platform.
Open the subtitle generator to try the workflow on a built-in sample before using your own footage.
How to add captions to a video in four steps
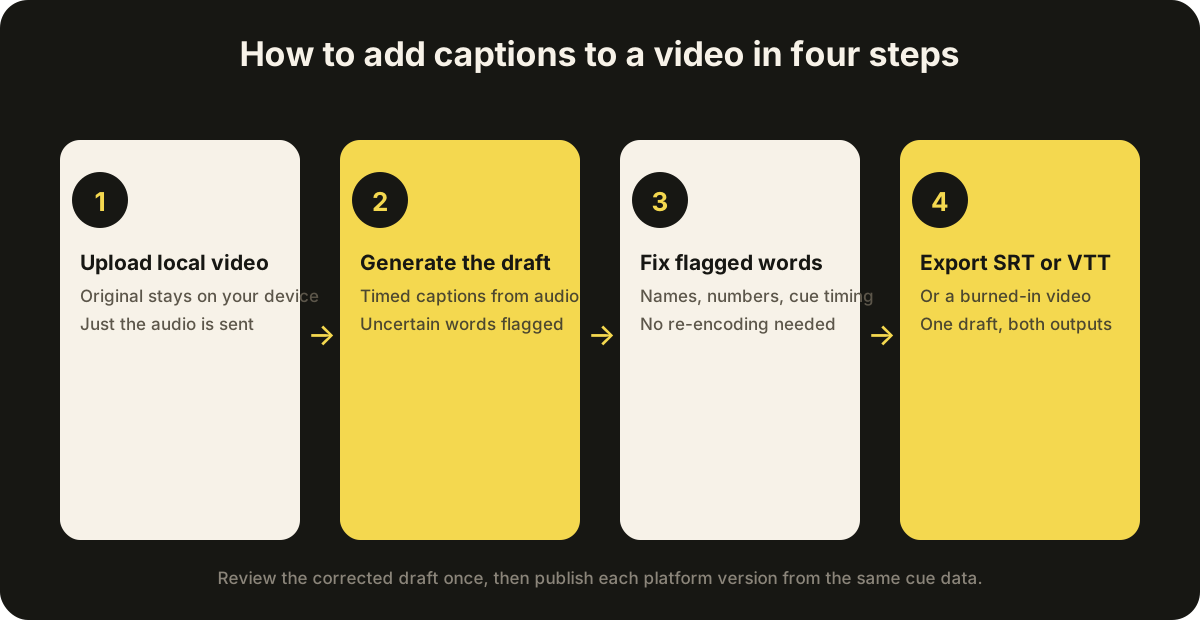
- Upload the video locally. The file stays on your device; only the extracted audio is sent for transcription.
- Generate the draft. Automatic speech recognition creates timed captions from the audio.
- Fix the flagged words and timing. Review low-confidence words, names and numbers, and adjust cues that start early or end late.
- Export the right asset. Download SRT or VTT for platforms that support caption files, or a burned-in video for feed-first platforms.
1. Choose the caption output first
Before generating anything, decide what the finished video needs:
- Closed captions are stored separately, so viewers can turn them on or off. SRT and VTT are common choices.
- Open captions are burned into the video and always visible. They work well for short-form feeds and muted autoplay.
- A transcript is plain text for review, publishing notes or another tool.
The distinction matters because an SRT file does not preserve the full visual treatment of a burned-in caption. See closed captions vs open captions for the trade-offs.
2. Start with the source video
Use the cleanest audio available. Reduce background music when it competes with speech, and confirm that the file contains an audible voice before paying for transcription. SubtitleGenerator performs the media admission, preview, audio extraction and silence check in the browser.
Your original video stays on your device. Only the extracted audio needed for transcription is sent to the transcription provider, and supported exports are rendered in the browser.
Downloaded videos are just local files: the same workflow applies, and nothing is re-uploaded to a hosting platform.
3. Review uncertain words before polishing style
A draft can look convincing while still getting a name, number or product term wrong. The editor should make uncertainty visible instead of forcing you to replay every line.
In the sample editor, press Tab to move to the next flagged word, Enter to accept it and Esc to stop. The count moves from three to zero and ends at All clear. Accepting a word preserves the cue timing and style.
4. Fix missing cues and timing
Transcription can miss quiet speech or place a cue slightly early. Add a subtitle at the current playhead when a line is missing. Edit the start and end values when the cue overlaps a cut or remains on screen too long.
Read the captions at normal playback speed. A technically correct transcript can still be unpleasant when line breaks are dense or captions cover important UI.
5. Choose a style for the footage
Use a clean style for interviews and tutorials, a word-level style for energetic short-form clips, or a cinematic style for narration. Check the 9:16, 16:9 or 1:1 preview and keep text inside the safe-area guide.
Every plan exposes all 33 styles and the full correction workflow. Style access is not used as a fake upgrade lever.
6. Export the right asset
Choose SRT or VTT when viewers should control captions. Choose a burned-in video when the words must always be visible. Choose ASS or SSA when a compatible workflow needs font, colour and position data, such as Premiere Pro or DaVinci Resolve — see caption workflows for editing suites. To generate the timed track from your own video, start with auto subtitles; to burn styled captions into the picture, use auto captions.
Review the export choice before you finish so the format, resolution and watermark match the plan you selected.
7. How to add subtitles to a video for free
Free tools exist at every quality level, but "free" means different things: some cap the video length, some add watermarks, some force an account before you can preview. Read the limits before you upload.
SubtitleGenerator keeps the free tier honest and usable:
- Free, no signup — upload a local video and generate the draft immediately.
- Free limits are explicit — 10 minutes per video, 60 minutes a month, 720p export with a small watermark.
- Pro — $9/month or $90/year, 30 minutes per video, HD, no watermark.
- Max — $15/month or $150/year, 60 minutes per video; PAYG adds processing time only, without raising the per-video cap.
If your video fits the free limits, you can finish the whole workflow without paying anything. When the limits matter — longer footage, HD, watermark-free — the upgrade is real and clearly described before you commit.
Start with the free plan — if the limits fit, you pay nothing.
8. What to look for in a video caption generator
Not every caption generator is the same. Compare tools on what actually decides your output quality:
- Uncertain-word review. Does the tool flag low-confidence words, or do you replay the whole video to find mistakes?
- Editing without re-encoding. Can you fix a typo and re-export the file, or must the whole video render again?
- Export formats. SRT and VTT cover most platforms; ASS and SSA matter for editing suites.
- Burned-in export. If you post to TikTok or Reels, can the tool render captions into the video?
- Privacy. Does the original video stay on your device, or is the full file uploaded to a server?
- Honest pricing. Are the limits, watermark and resolution stated before you pay?
This is exactly what SubtitleGenerator checks in its built-in sample, so you can verify every item above before using your own footage.
9. Platform quick reference
| Platform | Best output | Why |
|---|---|---|
| YouTube | SRT/VTT upload | Viewers can toggle; easy to revise; Shorts can use burned-in |
| TikTok | Burned-in video | Muted autoplay; no reliable caption-file support |
| Instagram Reels | Burned-in video | Feed autoplay with sound off |
| Burned-in video | Feed-first playback | |
| Vimeo / course platforms | SRT/VTT | Accessibility and control expectations |
| Premiere Pro / DaVinci Resolve | SRT or ASS | Import into an NLE timeline |
10. Common mistakes to avoid
- Choosing the output after exporting. Decide closed versus open before you generate, then the workflow stays one pass.
- Skipping the flagged-word review. Auto-generated drafts get names and numbers wrong; the flagged list is the fastest path to a clean file.
- Burning captions into long-form content. YouTube, Vimeo and courses expect a file, and viewers expect control.
- Ignoring muted autoplay. For Shorts and Reels, captions need to be on screen in the first seconds or the retention loss is permanent.
- Checking timing only in the editor. Read the captions at normal playback speed before you share.
When you finish, the corrected cue data is the source for every export: the SRT you upload to YouTube and the burned-in version you post to TikTok come from the same review pass.
Frequently asked questions
How do I add captions to a video for free?
Use a free browser-based caption tool. SubtitleGenerator lets you start without an account: Free covers 10 minutes per video, 60 minutes a month, and 720p export with a small watermark. You only pay when you need longer videos, HD or watermark-free exports.
Can I add subtitles to a downloaded video?
Yes. A downloaded file is just a local video, so the same workflow applies: upload it, review the generated draft, and export an SRT or VTT file or a burned-in version. Nothing is re-uploaded to a hosting platform, and your original file stays on your device.
What is the difference between captions and subtitles?
Captions describe all meaningful audio, including sound effects and speaker changes, for viewers who cannot hear the audio. Subtitles transcribe or translate only the dialogue. Open and closed describe how either one is delivered. See our closed captions vs open captions article for the full comparison.
How do I add captions to a YouTube video?
Upload an SRT or VTT file to YouTube so viewers can toggle captions, or edit them in YouTube Studio. For Shorts and other feed-first clips, burn the captions into the video so they appear during muted autoplay. Both exports come from the same corrected draft.
Can I edit captions after generating them?
Yes. Caption tools that keep the corrected draft in one place let you fix names, numbers and timing and re-export the file without re-encoding the video. SubtitleGenerator flags low-confidence words so you review exactly the lines most likely to be wrong.
How do I remove the watermark from captioned videos?
Free exports are 720p with a small watermark. Upgrading to Pro removes the watermark, unlocks HD export, and raises the per-video limit to 30 minutes. Max extends the limit to 60 minutes. The policy is the same in the tool and in this article.
How long does it take to add captions to a video?
The draft is generated automatically, so your time goes into reviewing flagged words and timing rather than typing. A short clip with clear audio can go from upload to export in minutes; longer or noisier footage needs more review time.
Put the workflow on a video
Inspect a local file or open the built-in sample to preview caption styles and export formats. Your video stays on your device.
Upload your video